So, I took a small break this week from working on the Star Lord costume to help another racer with their super hero outfit.
The costume was Honey Lemon from Big Hero 6.
Here is the costume.
My first task was making the helmet. To do this, I decided to use EVA foam. There are tons of tutorials and videos showing how to craft EVA foam costumes so, after studying up, I got to work.
We began by wrapping someone’s head with foil followed by masking tape. The tape helps reinforce the structure of the mock up. After drawing the helmet shape we wanted on the masking tape, we cut it off. It looked like this:
Helmet mock up.
At this point, I referenced a particularly helpful Youtube video to transfer the pattern to the foam. I watched it about 30 times. The guy’s accent is awesome.
After transferring the pattern to card stock and then foam, I cut out the foam and assembled the helmet. The foam helmet then looked like this:
Here is the base helmet before accent pieces and paint.
I used a few more foam pieces to make the wings. I used a dremel to shape the pieces. I then applied a couple layers of Mod Podge followed by multiple layers of Plastidip to reinforce the helmet and seal the foam.
Plastip seals the foam and provides a good base for the paint.
I painted it afterwards with multiple layers of watered down acrylic paint. We went with a shade that was a little more “pink” than the original.
The color is more pink than the original.
Then, I used thinner craft foam from Hobby Lobby to make some of the accent pieces. I painted the craft foam orange before attaching them to the helmet.
The nearly finished helmet.
Unfortunately, I’m still a novice at this and so wasn’t able to get the helmet as smooth as I would have liked. I still need to apply a clear coat, but here is the almost finished product:
Nearly done!
The race is less than two weeks away! Thanks to those who have already donated!
I’m not going to lie, the boot covers were intimidating. I found some tutorials online, but didn’t think I had the leather-working skills to pull them off effectively. So, I outsourced the labor.
I found a gentleman named James Neathery who is pretty good with leather. Having already made numerous copies of these boot covers, I sent him a message asking him to make a pair for me. If anyone is interested in custom projects, I’ll post his business card in the bottom of this blog post.
So, here is what they look like (with rocket booster mounted) side by side with the screen used boot covers:
While not exact, these things are pretty darn good. Of course, Chris Pratt’s are more weathered…
You can see the quality of the leatherwork, here. They are well made. Each cover comes in two parts, the front and back. The straps stretch around the leg and fasten to rivets on the back of the boot covers. There is an elastic strap on the bottom that loop over the shoe, holding the cover in place. Having seen a picture of the clip on the back of my rocket boosters, James placed a strap on the side that allows me to attach them snugly.
Here’s a picture of the back:
Here is the back. The straps actually attach to a second leather piece.
I must say, they fit really well. James asked for some measurements so they fit me perfectly and over the pants I purchased for this outfit.
Overall, I’m really pleased. For an added bonus, I have a video showing the boot covers and what they look like when worn.
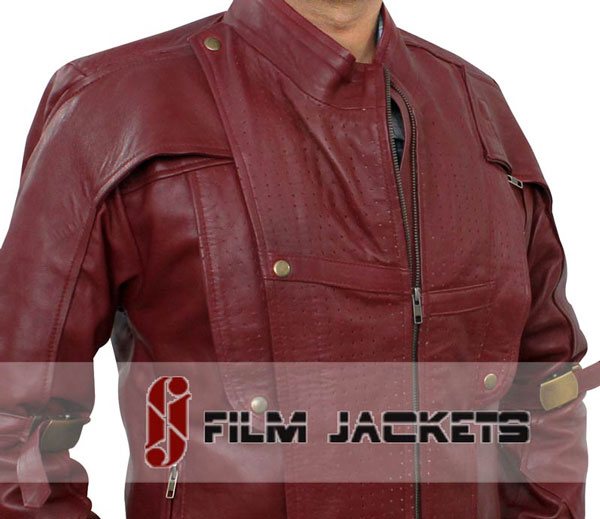
This is a picture of a display of the screen used jacket.
I’m not going to lie, I was putting this off for two reasons. First, there are so many options out there for the jacket that it was incredibly difficult to pick the right one. I couldn’t find any that matched exactly and so this became an exercise in comparing numerous jackets to find one with the details I liked and without ones I could sacrifice. Second, the jackets are expensive. Red leather jackets – even if I wasn’t going for an exact match – are not cheap.
And then, after weeks of agonizing over this decision, my wife made the jacket my anniversary present. Rather than surprise me the morning of (which she felt bad about), she decided to discuss it with me in advance and together we settled on a good one. We spent just a little bit extra to get one made of real leather rather than imitation, for realism and durability.
Here it is (pictures from the website):
Here it is! There are some details that don’t match exactly, but it’s not a bad substitute.
While looking at this jacket on the website, we noticed multiple reviews where buyers stated that they were able to wear the jacket day to day. To us, that was an added bonus. If you’re going to spend a ton of money on a jacket for a costume, may as well make it one you can wear when you’re not at a Superhero 5k or Comic-Con, right?
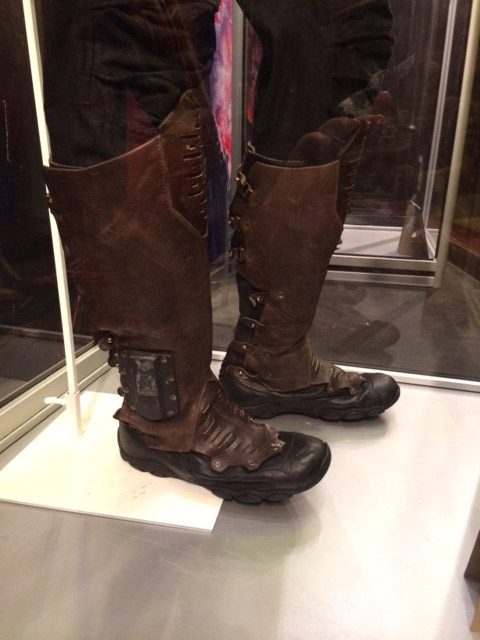
Like pretty much everything else Star-Lord wears, I’m pretty sure that these are custom made. They are definitely boots. The bottoms look like sketchers with a sneaker like sole. At first, I thought he was simply wearing sketchers with boot covers. However, when you examine the back of his legs, you can definitely tell that he is wearing boots. They are weird boots, but boots nonetheless.
As I saw it, I had two ways of tackling these.
Buy Sketchers. Proper boot covers would conceal the fact that I’m not wearing shoes.
Find boots – hope they look somewhat like the screen used versions.
I chose to go with option 1. Because the majority of whatever boots I bought would be covered by the boot covers, it made sense to me to focus on making the exposed part of the footwear – the part on my feet – match as best as possible. It also occurred to me that running in boots sucks. A lot. Wearing shoes would make things a lot easier.
For matching shoes, I went with these:
Available on Amazon!
These sketchers seem to match the base of the boots fairly well. In particular, I noticed that the soles as viewed from the sides appears to be dead on. So, these are what I went with. Let’s hope that it’s not too noticeable that I’m not wearing boots!
I’m going to take a quick break from the costume and CASA to share something awesome.
Yesterday, Chris Pratt, the actor behind Star-Lord, asked his Facebook fans to create a new cover photo for his page. I’m not sure he knew exactly what he was getting himself into, but his wall quickly exploded with Photoshop awesomeness. Here’s his guidance:
Hello friends and fans. I am in the market for a new header for my FB page. I want to do a contest. Whoever replies with the best header (make sure your signature is big enough to be seen) will have the honor of it being my official header.
I don’t know photo shop. But you do and this could be a great way for me to notice you and give you accolades plus maybe a free dinner at applebees or something like that who knows sky’s the limit.
so. i need a header. which looks like it would be 1 tall x 3.5 wide.
I’m looking to have Peter Quill, Owen, Andy and Emmet in the mix. possibly some other fun stuff including but not limited to previous roles, my family, eagles, american flags, guns, cool ford raptors, cigars, explosions, anything sly stallone, bloodsport, early steven segal, anything that looks bad ass and will say, “Hey this facebookprofile is chris’s and this is what he’s all about.” maybe some raptors, or even some largemouth bass or deer or trophy elk, maybe some cool guns or rollerblades or possibly even a nascar or a steak maybe even some corndogs. don’t ask me! you decide!
so yeah. who’s gonna get me the best one and have their name displayed for millions of people to see?
Here are some of my favorites:
Created by Aisling O’Hagan-Gamble. I love how it all blends together. Kind of reminds me of Firefly.
Created by Ramel Ureña. Love the raptors. I’m not sure how he did a Lego raptor…but it’s seriously awesome.
Kode Abdo created an awesome original background. Love that he’s riding a raptor holding a beer. Only Chris Pratt could do that without spilling the whole thing.
If you can’t Photoshop, Lego. Motto to live by. Here’s one by Cody Ogrentz.
Ginger Clark went in a completely different direction because…why not? I admire the originality.
This one submitted by Mitchell Cotton. ‘Merica.
I love this one created by Brandi Kenney. She writes “Dear Mr. Pratt, I’m sure you’ve probably wondered: “What would happen if Peter Quill and Owen Grady’s raptors formed a band?” Well, I’m here to tell you that you don’t have to wonder anymore. Here is the cover album artwork for a record I like to think would have been heavily influenced by the Jackson 5″ Check out her Facebook page: Brandi Kenney – Design.
I call this one the Chris Pratt “James Bond” Header. Created by Monica Price.
Ryan Adams submitted this gem. I have no words. Chris Pratt did. He said, “this might be the one!!!”
If there’s one thing Chris Pratt gets besides acting and raptor taming, it’s social media.
Which one is your favorite? Is there another one you would like to see added to the list? Let me know!
As always, if you enjoy the blog, feel free to subscribe and support me by donating to CASA. Link on the right! –>
These were a fun little art project. Let me remind you what they looked like when I received them:
As you can see, it needs some finishing work.
Using an X-ACTO knife, I cleaned out the grooves and tried to smooth out any rough parts on these props. Once I was satisfied with the grooves, I spray painted them flat black.
Spray painting the booster controls. I made sure not to fill the grooves with paint by overdoing it with the paint.
Using a brush this time, I slowly applied a layer of silver Rub-N-Buff to give it a dirty, metallic look. I left the center button black to match the film used prop. When I liked the look, I sprayed it with a coat of glossy Deft to protect the paint.
One thing I noticed with the Rub-N-Buff is that it NEEDS the clear coat. With paint, you can get away without the protective coat. You would be taking a chance that the paint chips, but you could handle the prop carefully and get away with it. Not so with Rub-N-Buff. Because it is wax based, a thin coat never really seems to dry completely. It will rub off and blemish if touched with enough force. Just a word of caution there.
These controls are another small detail which I probably could have skipped.
But I didn’t.
As a reminder of what these are and where they fit in the overall outfit, here’s a (somewhat blurry) screenshot of Star Lord’s leg:
See the booster control on the leg?
At first, I thought about making them. They don’t seem terribly detailed. In preparation, I began looking around for close ups and other fan made mock ups to base my model off of.
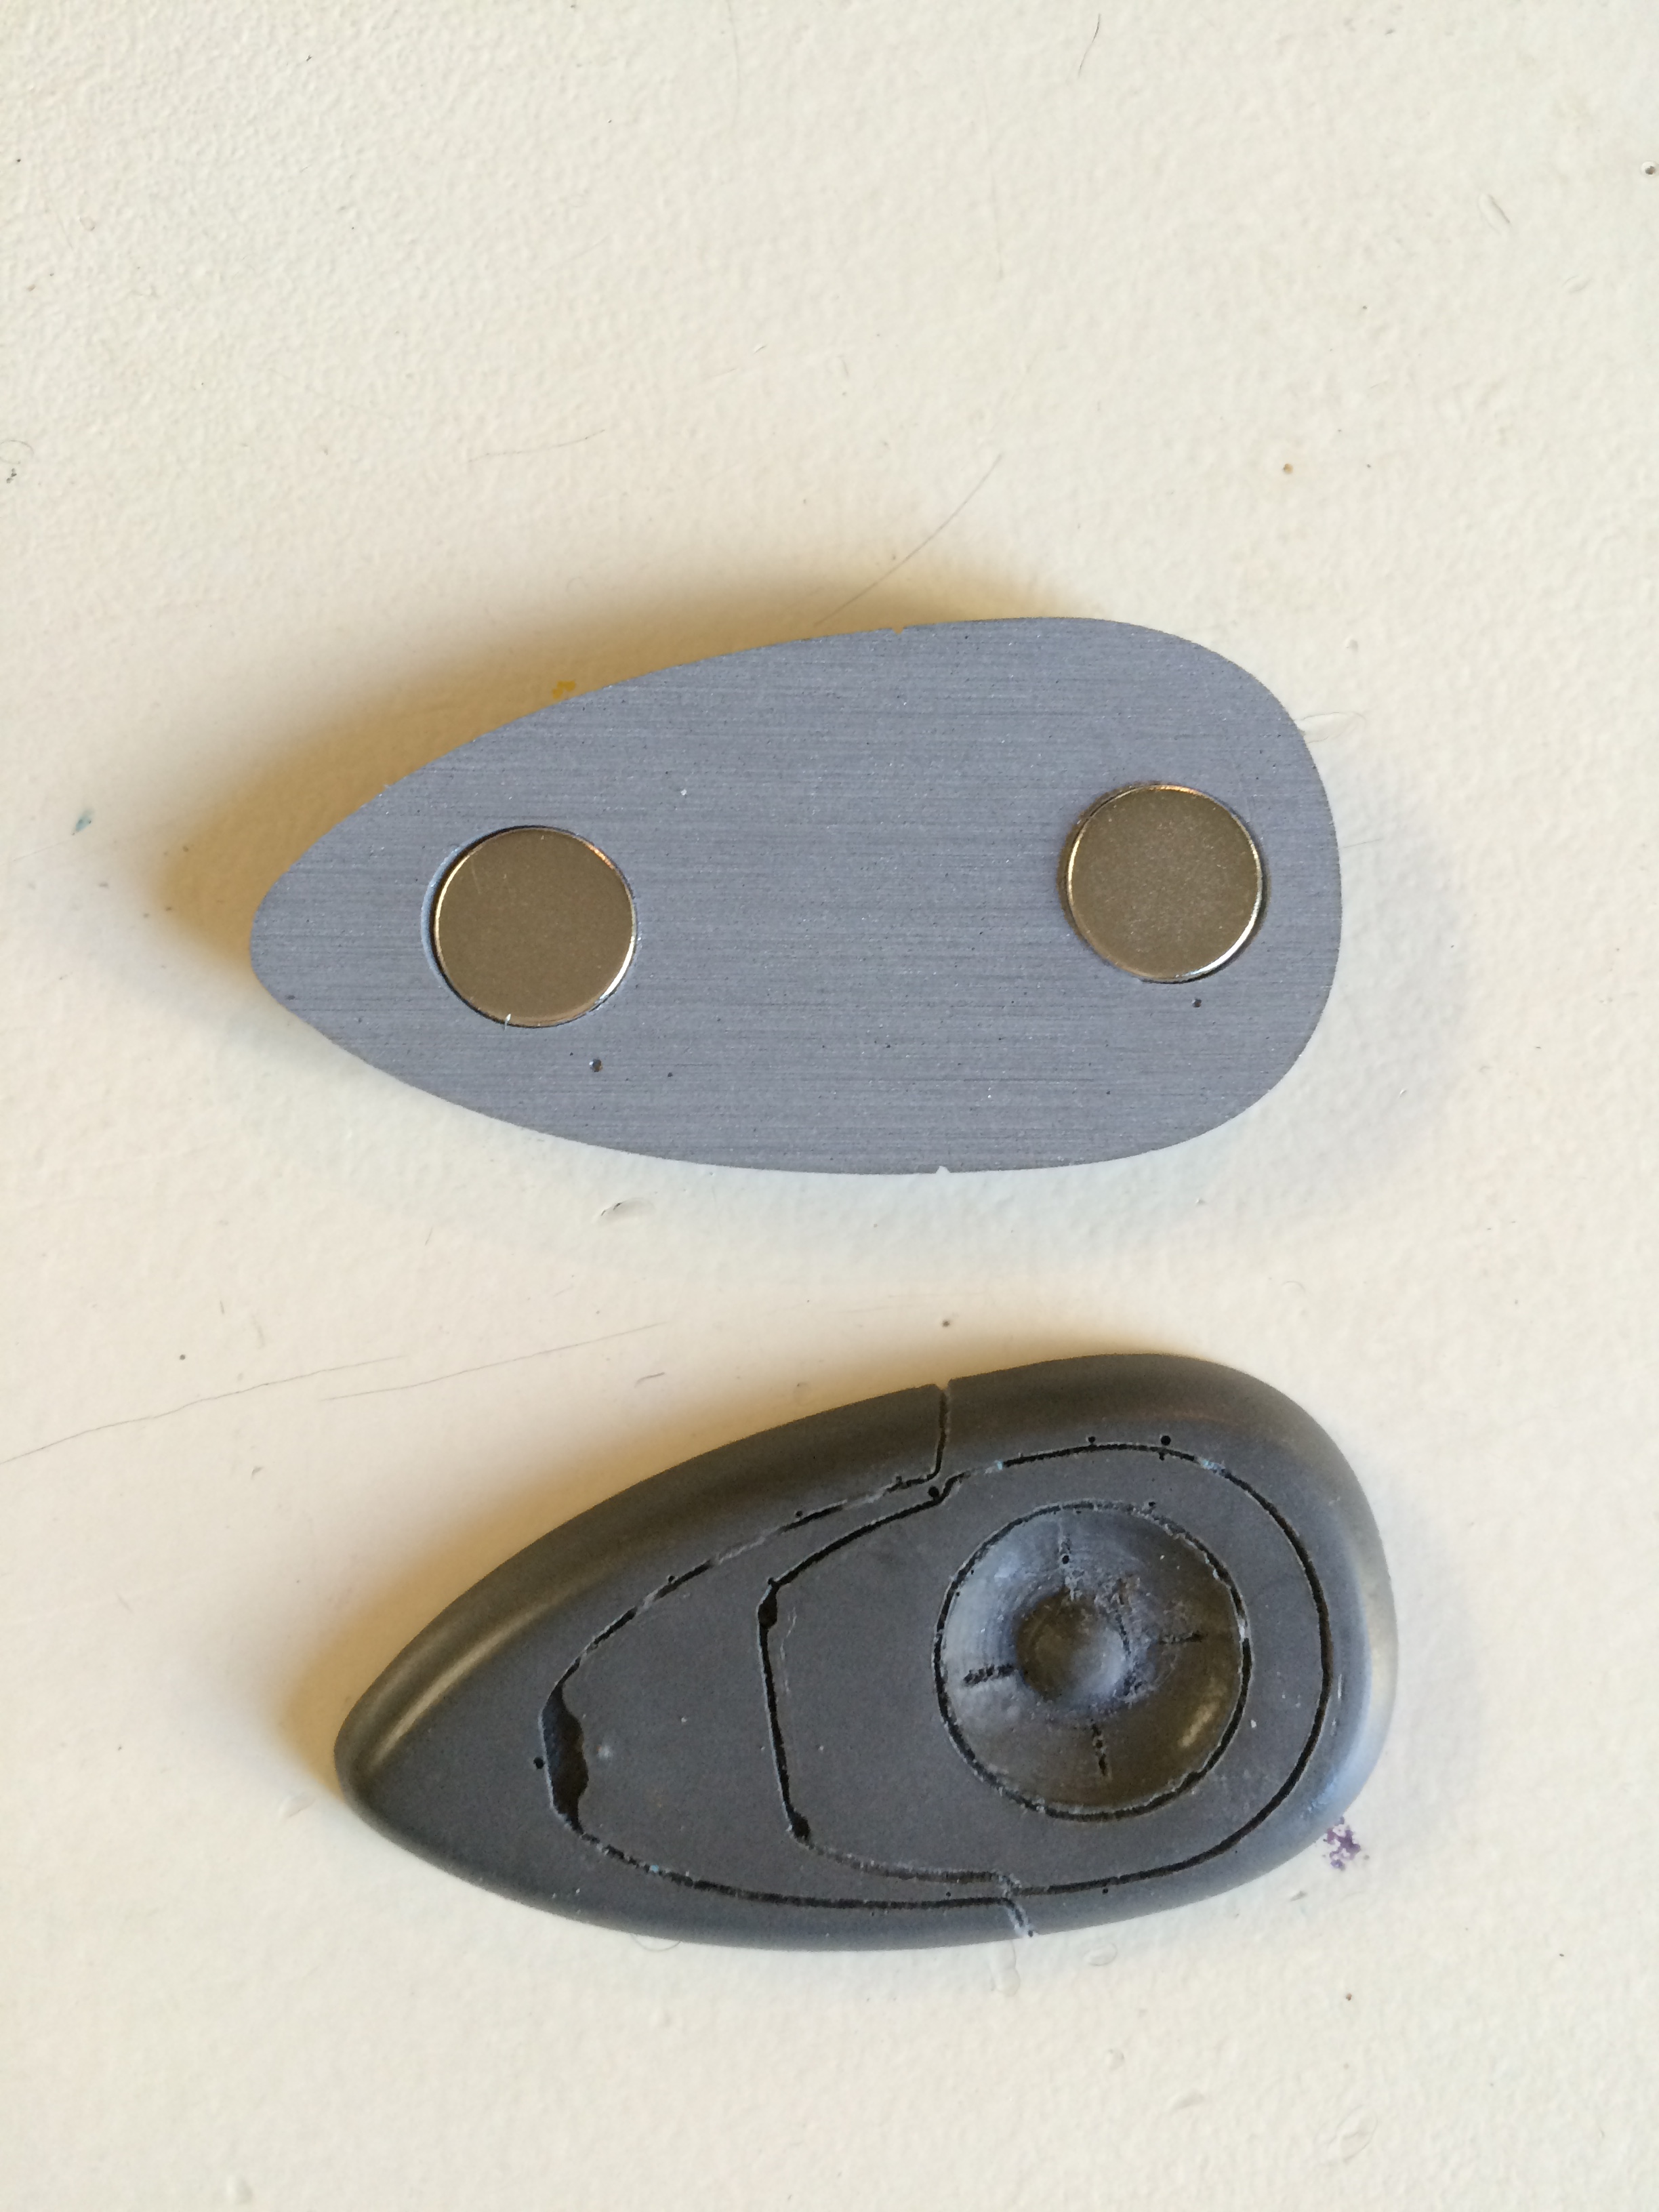
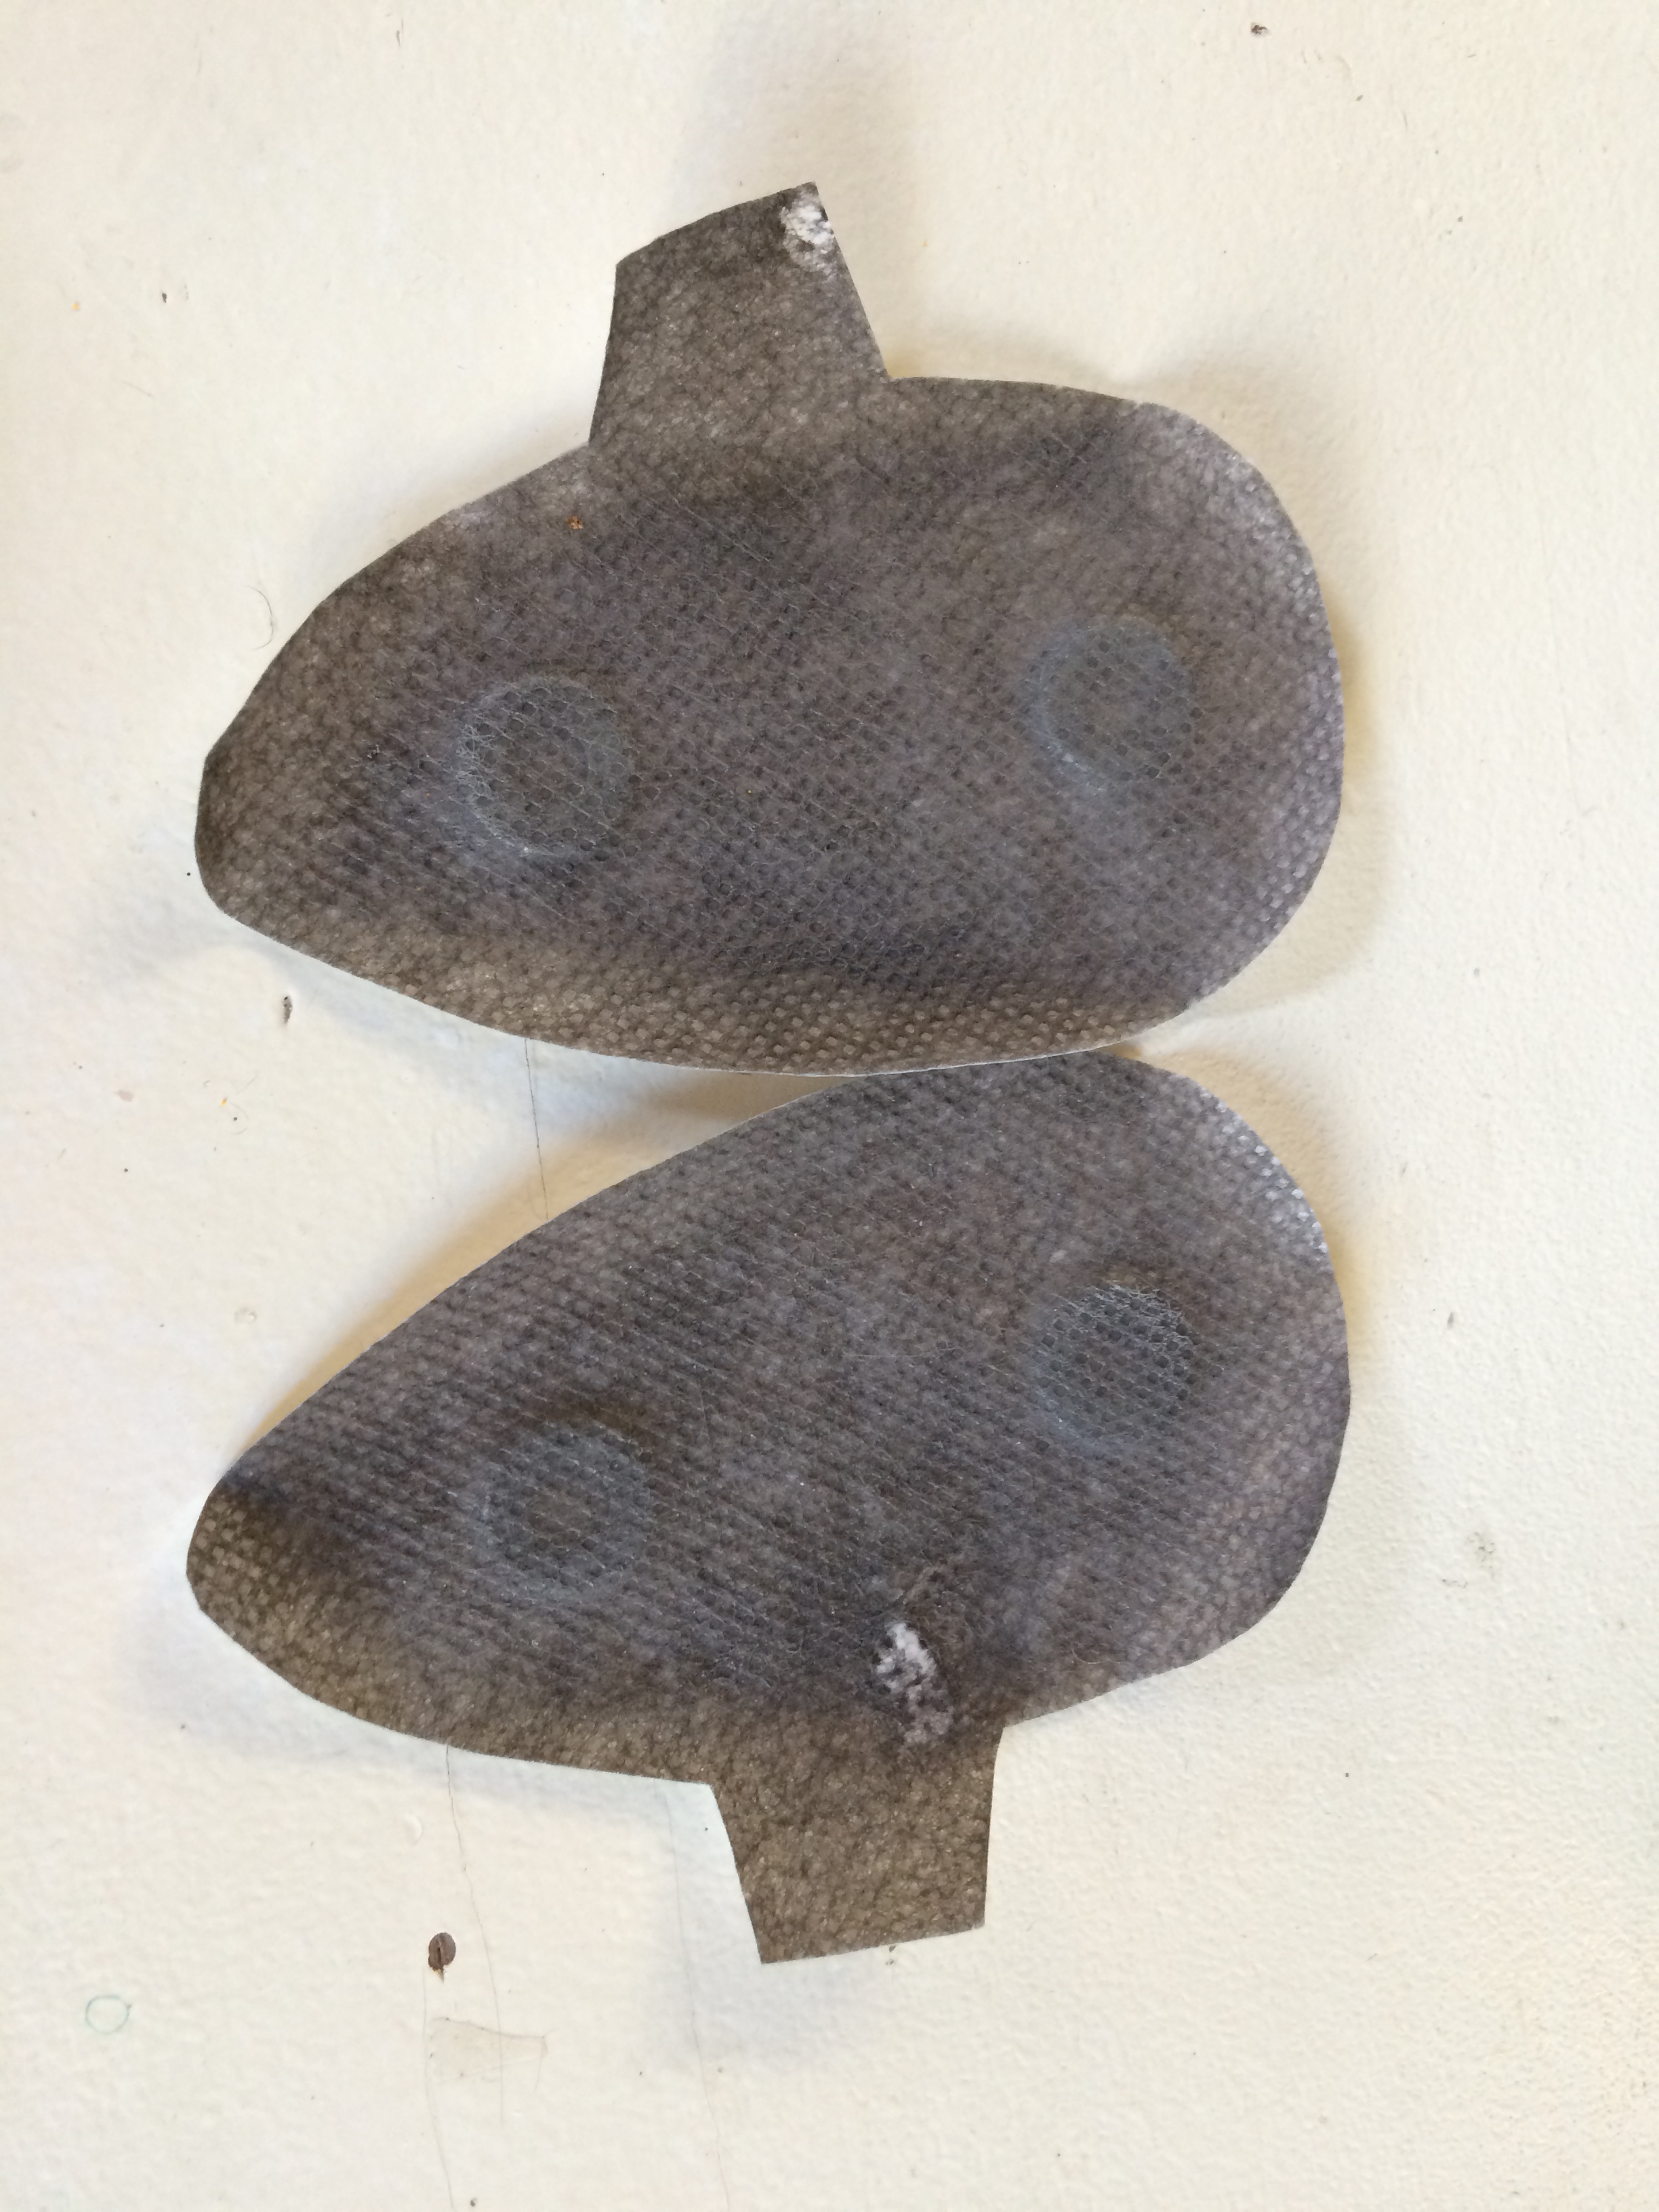
While searching, I ended up on Etsy and found some cool models for sale. One, in particular, caught my eye. A shop called Nova Props cold casts rocket booster controls from hard plastic. What sets them apart from other fan made props is the strong magnets inserted in them. Nova props sells the controls with iron on patches containing magnets of their own.
Buying these meant that I didn’t have to spend time figuring out how to attach the controls to the pants. Definitely a time saver. Here’s some shots of the controls taken after I received them:
As you can see, it needs some finishing work.
This shows the front and back. You can see the magnets.
These are the rocket control patches.
As you can see, the controls need some finishing work. Shouldn’t be hard to finish them in the same way I did the rocket boosters.
One step closer. It’s amazing how many steps there are to getting this done.
Star-Lord cosplayers have found various ways to deal with Peter Quill’s Walkman. Although it seems like an ancillary prop, it is definitely part of what makes Star-Lord…well, Star-Lord and most people have been loathe to ignore it.
You might ask (as I did), “Aren’t Walkmans obsolete? They should be easy to find and cheap to buy, right?”
I’m sure there are plenty of cheap, portable cassette players which one could find on eBay for pennies. But Star-Lord’s Walkman was no cheap player.
When Peter Quill was snatched by the Ravagers, he brought with him his Sony TPS-L2, one of Sony’s earliest models. The first Sony Walkman, actually. Made in 1979, the TPS-L2 was sought by audiophiles long before Guardians of the Galaxy was even pitched.
Moderately expensive even before Guardians, screenshots of Chris Pratt wearing the TPS-L2 drove prices through the roof. Guardians fans and Star-Lord cosplayers were desperate to get their hands on it. Prices on eBay ranged from $200 (for broken devices) to $800 (for working versions). Wow. (check this article: Price for “Guardians of the Galaxy” Walkman Skyrockets on eBay).
This was a quandary. I wanted an accurate prop, but didn’t want to sell a major organ to get it. After doing much research, here were the options:
Get a cheap Walkman and go with it. Trust that no one would know the difference.
Stickers. Fans have created stickers which can make a box of the appropriate size look like Peter Quill’s Walkman. I actually received some stickers with the headphones I ordered.
3D printing. I could order a 3D printed Walkman (available on Etsy) and paint it the appropriate colors. Fun. Maybe.
Buy an actual 1979 Walkman. A broken one would set me back about $180 and a working one, well, probably around $400 minimum.
So, which way did I go? I bought an actual Walkman. Yes, yes, it was expensive. Before you judge me, here’s how it happened…
At first, I had decided to go with a 3D printed model for the costume. It would have cost about $30. Just for fun, though, I decided to keep my eye on eBay to see what the actual models were going for. Many working Walkmans (Walkmen?) were selling for $300+. A few sellers had listed theirs for around $500 or “best offer.” I annoyed a few of them by throwing some $100 best offers out there and crossing my fingers. No dice.
These are a few TPS-L2s that sold within the last 90 days on eBay. If you see one of these in a thrift store, buy it.
However, last week, I got lucky. A gentleman from Florida listed a working 1979 TPS-L2 for $195. I saw the listing 30 minutes after it went up. Hmm. I looked the listing over…
Most sellers realize that their device is not only a collectible piece of audio history but a highly sought after prop necessary to produce screen accurate Star-Lord costumes. Consequently, they list “Guardians of the Galaxy” somewhere in the title or subtitle. This seller didn’t have “Guardians of the Galaxy” anywhere on his listing. Maybe he didn’t know what he had? Anyway, I bought it.
I know what a lot of you are thinking. $195 for a prop? For a piece of a costume? Seriously? I know, I know…but consider this:
This was a deal. Honestly, I could turn around and list this device for double what I paid for it on my eBay store…and it would sell. Fast. Yes, it is expensive. But it’s also an investment. With the release of Guardians of the Galaxy 2 coming, the value is not going down any time soon. I figure, if I need the money, I can sell this, make a profit, and donate the profit to CASA.
So, after a few days of waiting, I received the Walkman. Today. You can check it out in the video below.
Unfortunately, it isn’t working perfectly, at the moment. I tested it with one tape and the sound is coming out a little warped. I’m really hoping it’s just the tape. I’ll keep you posted!
So here I am, about 30 days in. I can definitely say that this project has been far more work than I imagined it would be when I started. I considered the time and money each piece would require to find, but didn’t think about the hours and hours I would spend customizing each item. The sanding, gluing, painting, sealing, etc. It adds up. The money adds up too. I doesn’t seem like a lot when each item is purchased days apart, but when I add it all together, and take into account the cost of crafting materials, the cost is significant. Quite significant. It’s a little stressful, honestly.
However, I have to follow that sentiment with this one: all my backers have made this project worth it. I’m blown away by the generosity of all those who have donated to the campaign thus far. Every time I get a little stressed out by the work I have yet to do (and the money I’ve spent) thus far, I remember that together we’ve raised $1000 CASA over the last 30 days. That’s incredible. So, thanks to my donors, blog followers, and everyone who has supported me thus far. Let’s keep the train rolling!
I recently purchased a few new items that I can’t wait to share with everyone. As soon as I get them, expect some awesome updates. Stay tuned and spread the word!
The first booster is finished! Here’s how it went…
After the paint dried, I used a black wash (black paint mixed with water) to darken the silver and bring out some of the details. It makes it look dirty, old, and used. I then dry-brushed silver rub-n-buff on the edges and raised surfaces. If this booster were real, black paint would have rubbed off on these areas. To further add to the used look (and replicate the screen used prop), I gashed the black paint in a couple of places and then filled in the gash with silver paint. This was designed to simulate the booster being dinged and battered during use.
To finish it off, I applied a clear layer of Deft (Satin Finish) in order to protect the paint job.
Here’s how it turned out:
Here’s the progression, from start to finish.
I would love to hear thoughts, comments, and suggestions. Leave them below!