So, I took a small break this week from working on the Star Lord costume to help another racer with their super hero outfit.
The costume was Honey Lemon from Big Hero 6.
Here is the costume.
My first task was making the helmet. To do this, I decided to use EVA foam. There are tons of tutorials and videos showing how to craft EVA foam costumes so, after studying up, I got to work.
We began by wrapping someone’s head with foil followed by masking tape. The tape helps reinforce the structure of the mock up. After drawing the helmet shape we wanted on the masking tape, we cut it off. It looked like this:
Helmet mock up.
At this point, I referenced a particularly helpful Youtube video to transfer the pattern to the foam. I watched it about 30 times. The guy’s accent is awesome.
After transferring the pattern to card stock and then foam, I cut out the foam and assembled the helmet. The foam helmet then looked like this:
Here is the base helmet before accent pieces and paint.
I used a few more foam pieces to make the wings. I used a dremel to shape the pieces. I then applied a couple layers of Mod Podge followed by multiple layers of Plastidip to reinforce the helmet and seal the foam.
Plastip seals the foam and provides a good base for the paint.
I painted it afterwards with multiple layers of watered down acrylic paint. We went with a shade that was a little more “pink” than the original.
The color is more pink than the original.
Then, I used thinner craft foam from Hobby Lobby to make some of the accent pieces. I painted the craft foam orange before attaching them to the helmet.
The nearly finished helmet.
Unfortunately, I’m still a novice at this and so wasn’t able to get the helmet as smooth as I would have liked. I still need to apply a clear coat, but here is the almost finished product:
Nearly done!
The race is less than two weeks away! Thanks to those who have already donated!
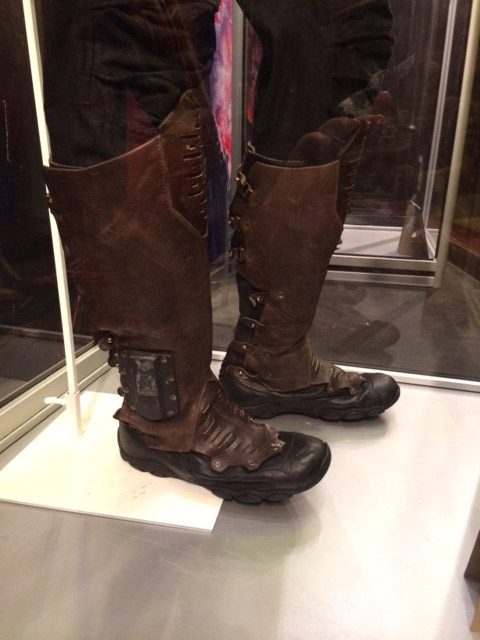
Like pretty much everything else Star-Lord wears, I’m pretty sure that these are custom made. They are definitely boots. The bottoms look like sketchers with a sneaker like sole. At first, I thought he was simply wearing sketchers with boot covers. However, when you examine the back of his legs, you can definitely tell that he is wearing boots. They are weird boots, but boots nonetheless.
As I saw it, I had two ways of tackling these.
Buy Sketchers. Proper boot covers would conceal the fact that I’m not wearing shoes.
Find boots – hope they look somewhat like the screen used versions.
I chose to go with option 1. Because the majority of whatever boots I bought would be covered by the boot covers, it made sense to me to focus on making the exposed part of the footwear – the part on my feet – match as best as possible. It also occurred to me that running in boots sucks. A lot. Wearing shoes would make things a lot easier.
For matching shoes, I went with these:
Available on Amazon!
These sketchers seem to match the base of the boots fairly well. In particular, I noticed that the soles as viewed from the sides appears to be dead on. So, these are what I went with. Let’s hope that it’s not too noticeable that I’m not wearing boots!
These were a fun little art project. Let me remind you what they looked like when I received them:
As you can see, it needs some finishing work.
Using an X-ACTO knife, I cleaned out the grooves and tried to smooth out any rough parts on these props. Once I was satisfied with the grooves, I spray painted them flat black.
Spray painting the booster controls. I made sure not to fill the grooves with paint by overdoing it with the paint.
Using a brush this time, I slowly applied a layer of silver Rub-N-Buff to give it a dirty, metallic look. I left the center button black to match the film used prop. When I liked the look, I sprayed it with a coat of glossy Deft to protect the paint.
One thing I noticed with the Rub-N-Buff is that it NEEDS the clear coat. With paint, you can get away without the protective coat. You would be taking a chance that the paint chips, but you could handle the prop carefully and get away with it. Not so with Rub-N-Buff. Because it is wax based, a thin coat never really seems to dry completely. It will rub off and blemish if touched with enough force. Just a word of caution there.
So, we’re at about the midpoint of this project. I fully realize that it’s been a while since I’ve updated you all on my progress. It has been an incredibly busy week!
I’ve been working on a number of projects over the past few days and so the costume building was somewhat sidelined. I’m not going to lie, after a long day of work and with multiple demands on my time, it is sometimes hard to motivate myself to work on costume pieces. I’ve managed to put in a few minutes here and there, but not as much as I would like. With the clock ticking down, I’m starting to get anxious!
That being said, I wanted to take a second to thank you all for the encouragement I’ve received over the past few weeks. What has inspired me more than anything, besides the knowledge that I’m supporting CASA’s mission, is the support I continue to receive from readers, social media connections, and friends. I can’t thank everyone enough! With that being said, I’m ready to get back into costume building, and look forward to continued feedback and support from you all!
I have a few updates to post over the next few days. For today, I wanted to share a picture of my desk. It pretty much captures where various “crafting” projects are at:
My Desk. Rocket boosters, blasters, headphones…
You can see that I have a ways to go with some of these!
As always, I’m grateful for all the encouragement and I know CASA is grateful for all the donations they’ve received thus far. Thanks again!
Star-Lord cosplayers have found various ways to deal with Peter Quill’s Walkman. Although it seems like an ancillary prop, it is definitely part of what makes Star-Lord…well, Star-Lord and most people have been loathe to ignore it.
You might ask (as I did), “Aren’t Walkmans obsolete? They should be easy to find and cheap to buy, right?”
I’m sure there are plenty of cheap, portable cassette players which one could find on eBay for pennies. But Star-Lord’s Walkman was no cheap player.
When Peter Quill was snatched by the Ravagers, he brought with him his Sony TPS-L2, one of Sony’s earliest models. The first Sony Walkman, actually. Made in 1979, the TPS-L2 was sought by audiophiles long before Guardians of the Galaxy was even pitched.
Moderately expensive even before Guardians, screenshots of Chris Pratt wearing the TPS-L2 drove prices through the roof. Guardians fans and Star-Lord cosplayers were desperate to get their hands on it. Prices on eBay ranged from $200 (for broken devices) to $800 (for working versions). Wow. (check this article: Price for “Guardians of the Galaxy” Walkman Skyrockets on eBay).
This was a quandary. I wanted an accurate prop, but didn’t want to sell a major organ to get it. After doing much research, here were the options:
Get a cheap Walkman and go with it. Trust that no one would know the difference.
Stickers. Fans have created stickers which can make a box of the appropriate size look like Peter Quill’s Walkman. I actually received some stickers with the headphones I ordered.
3D printing. I could order a 3D printed Walkman (available on Etsy) and paint it the appropriate colors. Fun. Maybe.
Buy an actual 1979 Walkman. A broken one would set me back about $180 and a working one, well, probably around $400 minimum.
So, which way did I go? I bought an actual Walkman. Yes, yes, it was expensive. Before you judge me, here’s how it happened…
At first, I had decided to go with a 3D printed model for the costume. It would have cost about $30. Just for fun, though, I decided to keep my eye on eBay to see what the actual models were going for. Many working Walkmans (Walkmen?) were selling for $300+. A few sellers had listed theirs for around $500 or “best offer.” I annoyed a few of them by throwing some $100 best offers out there and crossing my fingers. No dice.
These are a few TPS-L2s that sold within the last 90 days on eBay. If you see one of these in a thrift store, buy it.
However, last week, I got lucky. A gentleman from Florida listed a working 1979 TPS-L2 for $195. I saw the listing 30 minutes after it went up. Hmm. I looked the listing over…
Most sellers realize that their device is not only a collectible piece of audio history but a highly sought after prop necessary to produce screen accurate Star-Lord costumes. Consequently, they list “Guardians of the Galaxy” somewhere in the title or subtitle. This seller didn’t have “Guardians of the Galaxy” anywhere on his listing. Maybe he didn’t know what he had? Anyway, I bought it.
I know what a lot of you are thinking. $195 for a prop? For a piece of a costume? Seriously? I know, I know…but consider this:
This was a deal. Honestly, I could turn around and list this device for double what I paid for it on my eBay store…and it would sell. Fast. Yes, it is expensive. But it’s also an investment. With the release of Guardians of the Galaxy 2 coming, the value is not going down any time soon. I figure, if I need the money, I can sell this, make a profit, and donate the profit to CASA.
So, after a few days of waiting, I received the Walkman. Today. You can check it out in the video below.
Unfortunately, it isn’t working perfectly, at the moment. I tested it with one tape and the sound is coming out a little warped. I’m really hoping it’s just the tape. I’ll keep you posted!
So here I am, about 30 days in. I can definitely say that this project has been far more work than I imagined it would be when I started. I considered the time and money each piece would require to find, but didn’t think about the hours and hours I would spend customizing each item. The sanding, gluing, painting, sealing, etc. It adds up. The money adds up too. I doesn’t seem like a lot when each item is purchased days apart, but when I add it all together, and take into account the cost of crafting materials, the cost is significant. Quite significant. It’s a little stressful, honestly.
However, I have to follow that sentiment with this one: all my backers have made this project worth it. I’m blown away by the generosity of all those who have donated to the campaign thus far. Every time I get a little stressed out by the work I have yet to do (and the money I’ve spent) thus far, I remember that together we’ve raised $1000 CASA over the last 30 days. That’s incredible. So, thanks to my donors, blog followers, and everyone who has supported me thus far. Let’s keep the train rolling!
I recently purchased a few new items that I can’t wait to share with everyone. As soon as I get them, expect some awesome updates. Stay tuned and spread the word!
The first booster is finished! Here’s how it went…
After the paint dried, I used a black wash (black paint mixed with water) to darken the silver and bring out some of the details. It makes it look dirty, old, and used. I then dry-brushed silver rub-n-buff on the edges and raised surfaces. If this booster were real, black paint would have rubbed off on these areas. To further add to the used look (and replicate the screen used prop), I gashed the black paint in a couple of places and then filled in the gash with silver paint. This was designed to simulate the booster being dinged and battered during use.
To finish it off, I applied a clear layer of Deft (Satin Finish) in order to protect the paint job.
Here’s how it turned out:
Here’s the progression, from start to finish.
I would love to hear thoughts, comments, and suggestions. Leave them below!
Believe it or not, I found the rocket boosters more difficult to finish than the blasters.
After applying the wood filler and sanding the appropriate parts smooth, I spray painted the blasters flat black.
Here’s how it looked after the spray paint dried.
I decided to use Rub-N-Buff for the silver parts because I liked how the blaster finished. I used painter’s tape to control where the silver went. It…mostly worked.
I applied tape to try and control the silver as I applied it.
There was one particular part that gave me some trouble while painting as the model isn’t completely screen accurate. On the screen used prop, there is a is a black stripe on the middle of each side on a raised ring. On the 3D printed model, this ring doesn’t exist. I decided to use painters tape to create the black stripe on a part that would have otherwise been entirely silver. This broke up the silver on the sides and made it look closer to the screen used version. Here’s the booster after I applied silver paint:
Silver applied from the front.
From the side.
On the screen used prop, the metal on the top is blackened and fades into the black. I tried to replicate this.
Here’s the screen used prop compared to the 3D printed version.
This is the screen used prop compared to the 3D printed one.
There are still some details I have to work on. I want to apply a black wash to make it look weathered and some “battle damage.” I may or may not try and apply the bluing to the base. Stay tuned to see the final product.
For my next project, I decided to work on the rocket boosters. Here’s a reference screenshot:
These are the screen used rocket boosters.
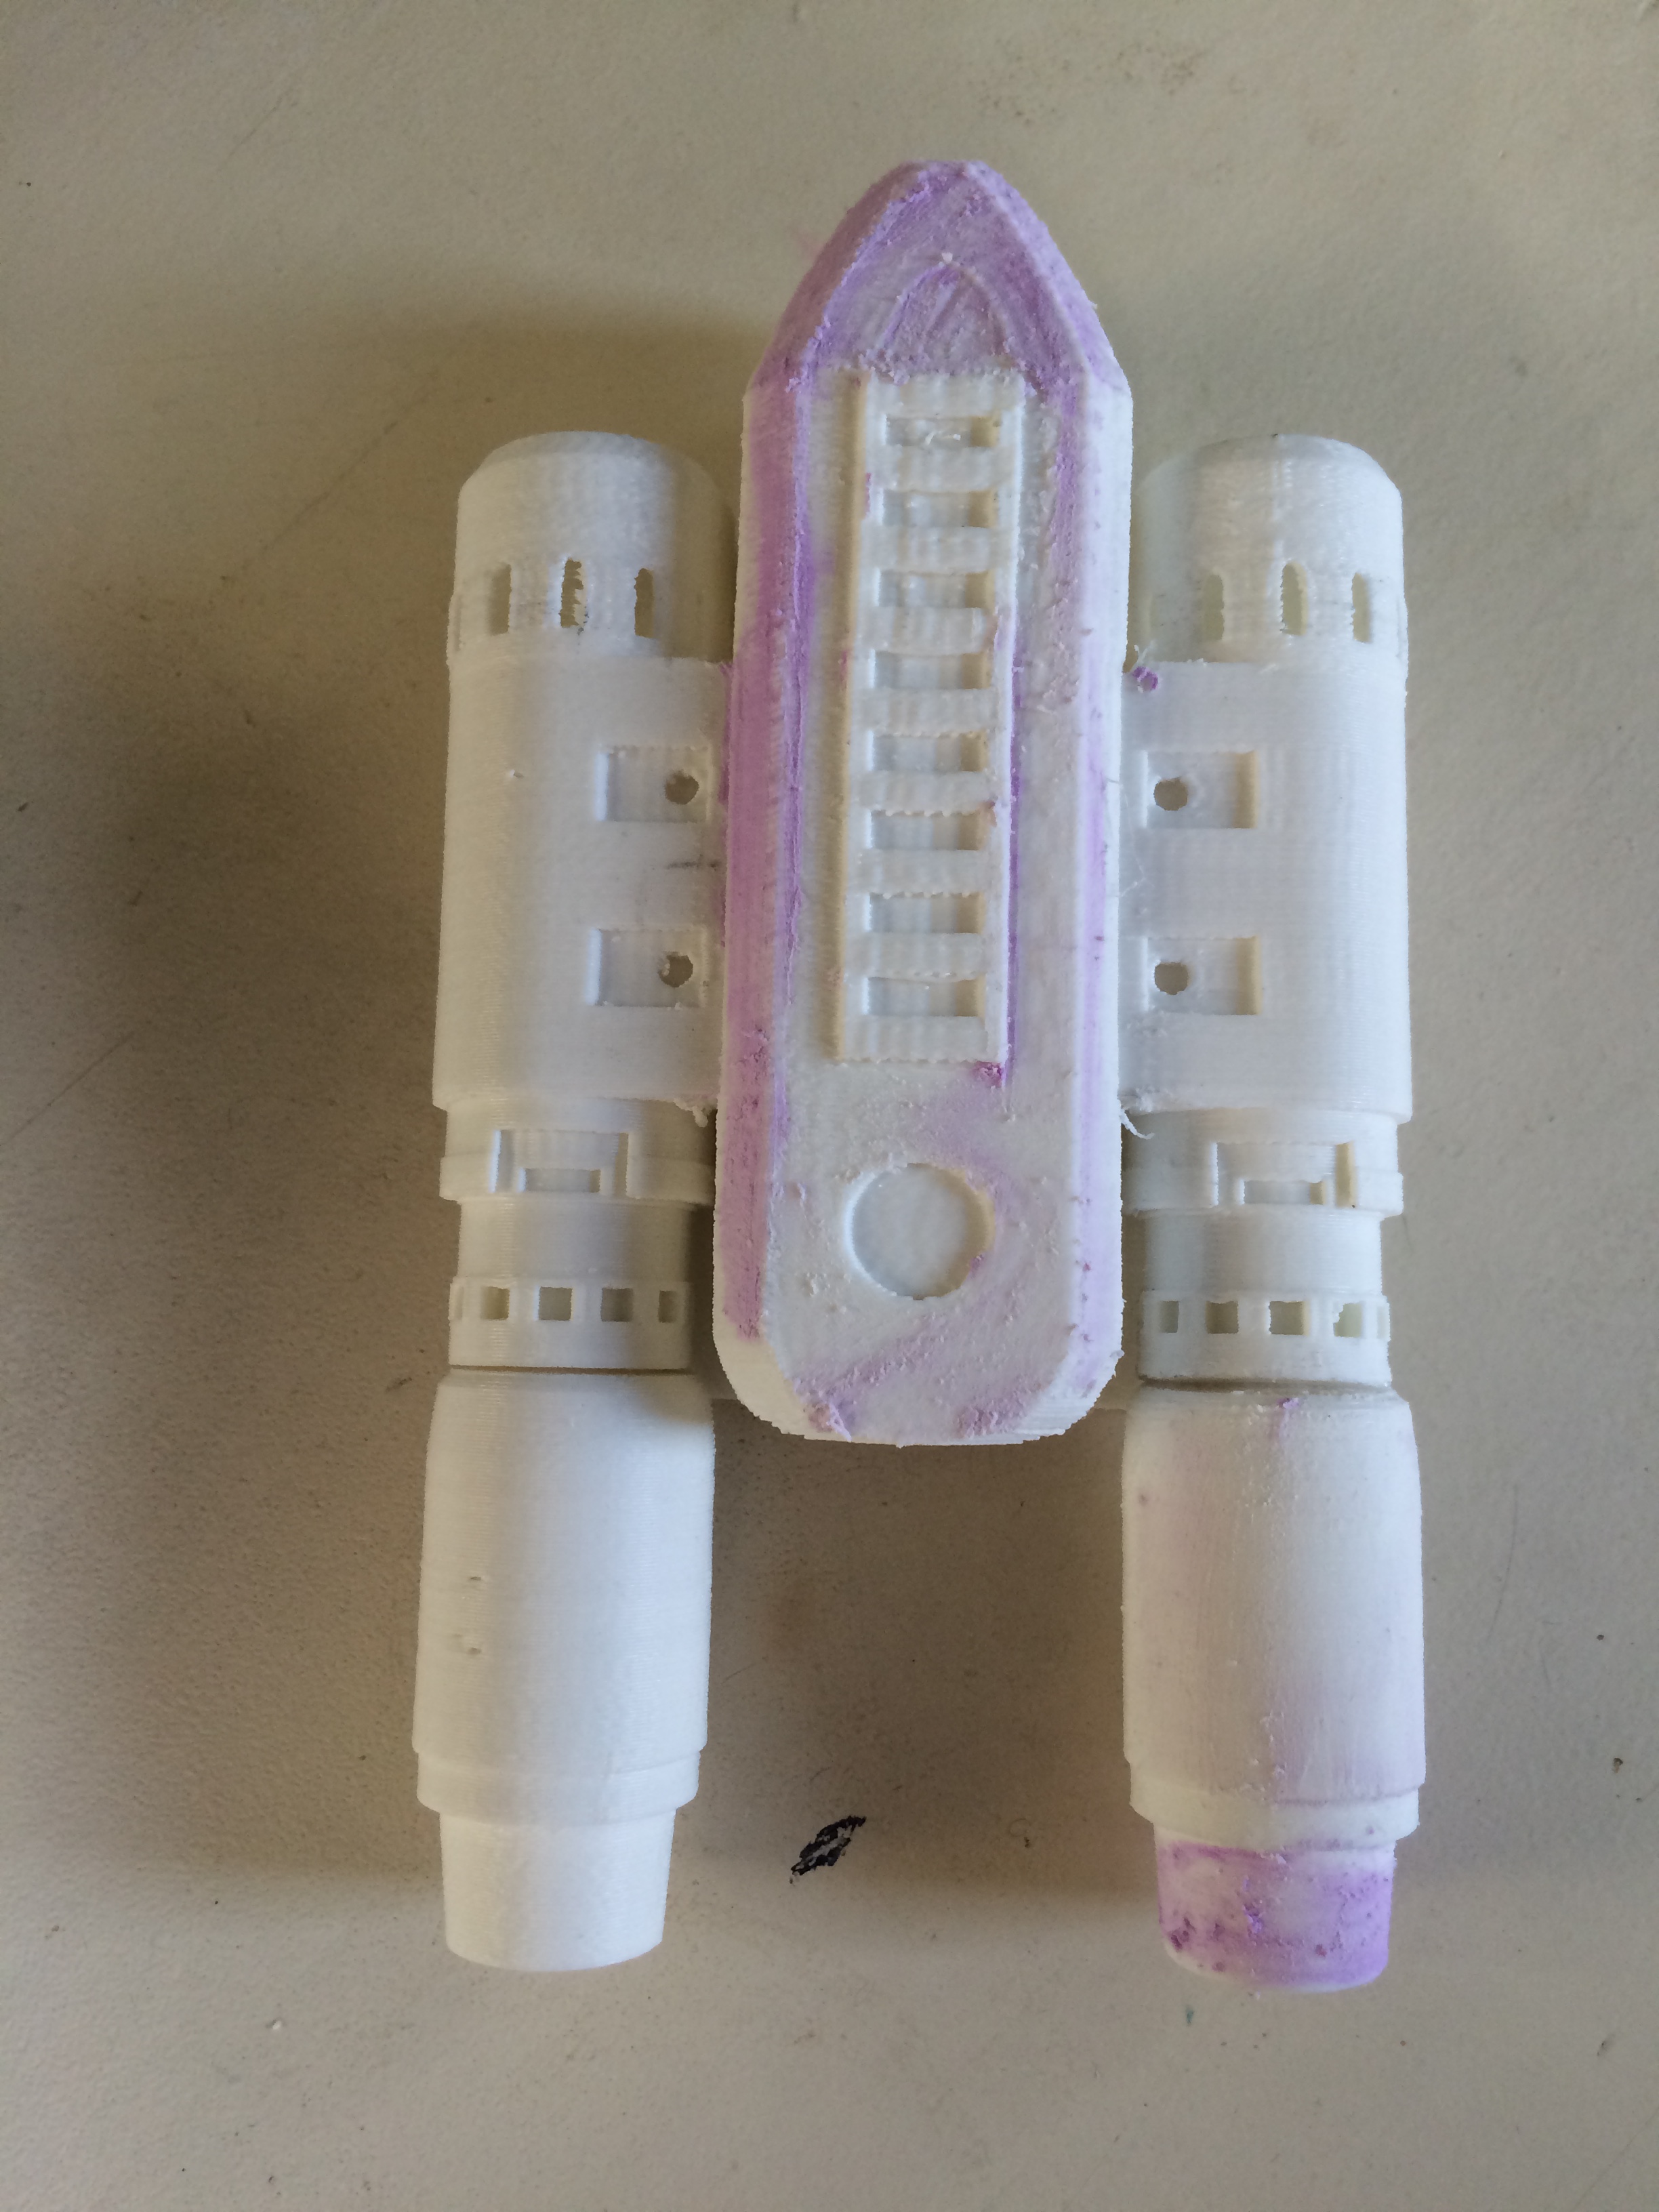
The best way to acquire these is by having them 3D printed. As the movies was coming out, members of the RPF spent time creating a 3D print file that’s fairly accurate. I could have downloaded the file and brought it somewhere for printing, but decided to order them from Etsy instead. So, a few bucks and a few days later, I received two of these in the mail:
The size and shape are pretty good. The problem is the texture. For those unfamiliar with 3D printing, the printed objects require a finishing if you want them to be smooth.
I did some research on finishing methods and settled on the one which I felt was the easiest. Using Elmer’s Wood Filler, I would fill the grooves and then sand the hardened filler to a smooth finish. Out of all of the finishing methods, I felt that this is the one I could most easily undo if I were to mess it up. This is my first time playing with 3D printing, after all.
This is the booster with some of the wood putty applied.
I have to say that this method requires some work. Smoothing out the the large areas is easy. However, it takes some effort to file some of the smaller details and areas. It definitely takes time. I bought some needle files to help with this.
As of now, I’m letting the wood putty dry some more. Hopefully, Ill be able to finish the first booster tomorrow.
Turns out, it takes a while for spray paint to dry completely. After letting the paint set for 24+ hours, I began phase two of the gun conversion.
After doing some research, I decided to use Deft Wood Finish for a clear coat. If you’re doing something like this, make sure to wear gloves and a mask. The mask is key. The fumes go to your head quickly and – as the bottle nicely points out – can cause brain damage. Yeah.
I had a little debate with myself when choosing what type of finish to use: gloss or satin. I liked the idea of using satin as the gun is supposed to be worn and dirty. I was afraid, however, of losing the metallic look of the rub-n-buff. I ended up applying the satin to the back two sections of the outer shell to see how it looked. I have to say, I loved the way it made the black paint look. However, I did lose the metallic luster of the rub-n-buff and so decided to go with a gloss for the rest of the gun.
After applying the first coat, I was worried that I had ruined my paint job. When the sealer goes on, it often clouds up, making the underlying paint job very hazy. To my relief, it became clear again as it dried. I took the advice of some online forums and did not touch the finish for 24+ hours. Apparently, the oils in your hands can soak into the finish before it is dry, leaving it with a sticky texture forevermore. We certainly don’t want that!
My reference pictures helped during reassembly. I did have to break the blaster down again after discovering that one of the charging slides didn’t function properly. Other than that, it was a fairly straightforward process. As complicated as the inner workings looked to me, I managed to get it back together with minimal confusion or difficulty. And it functions perfectly!
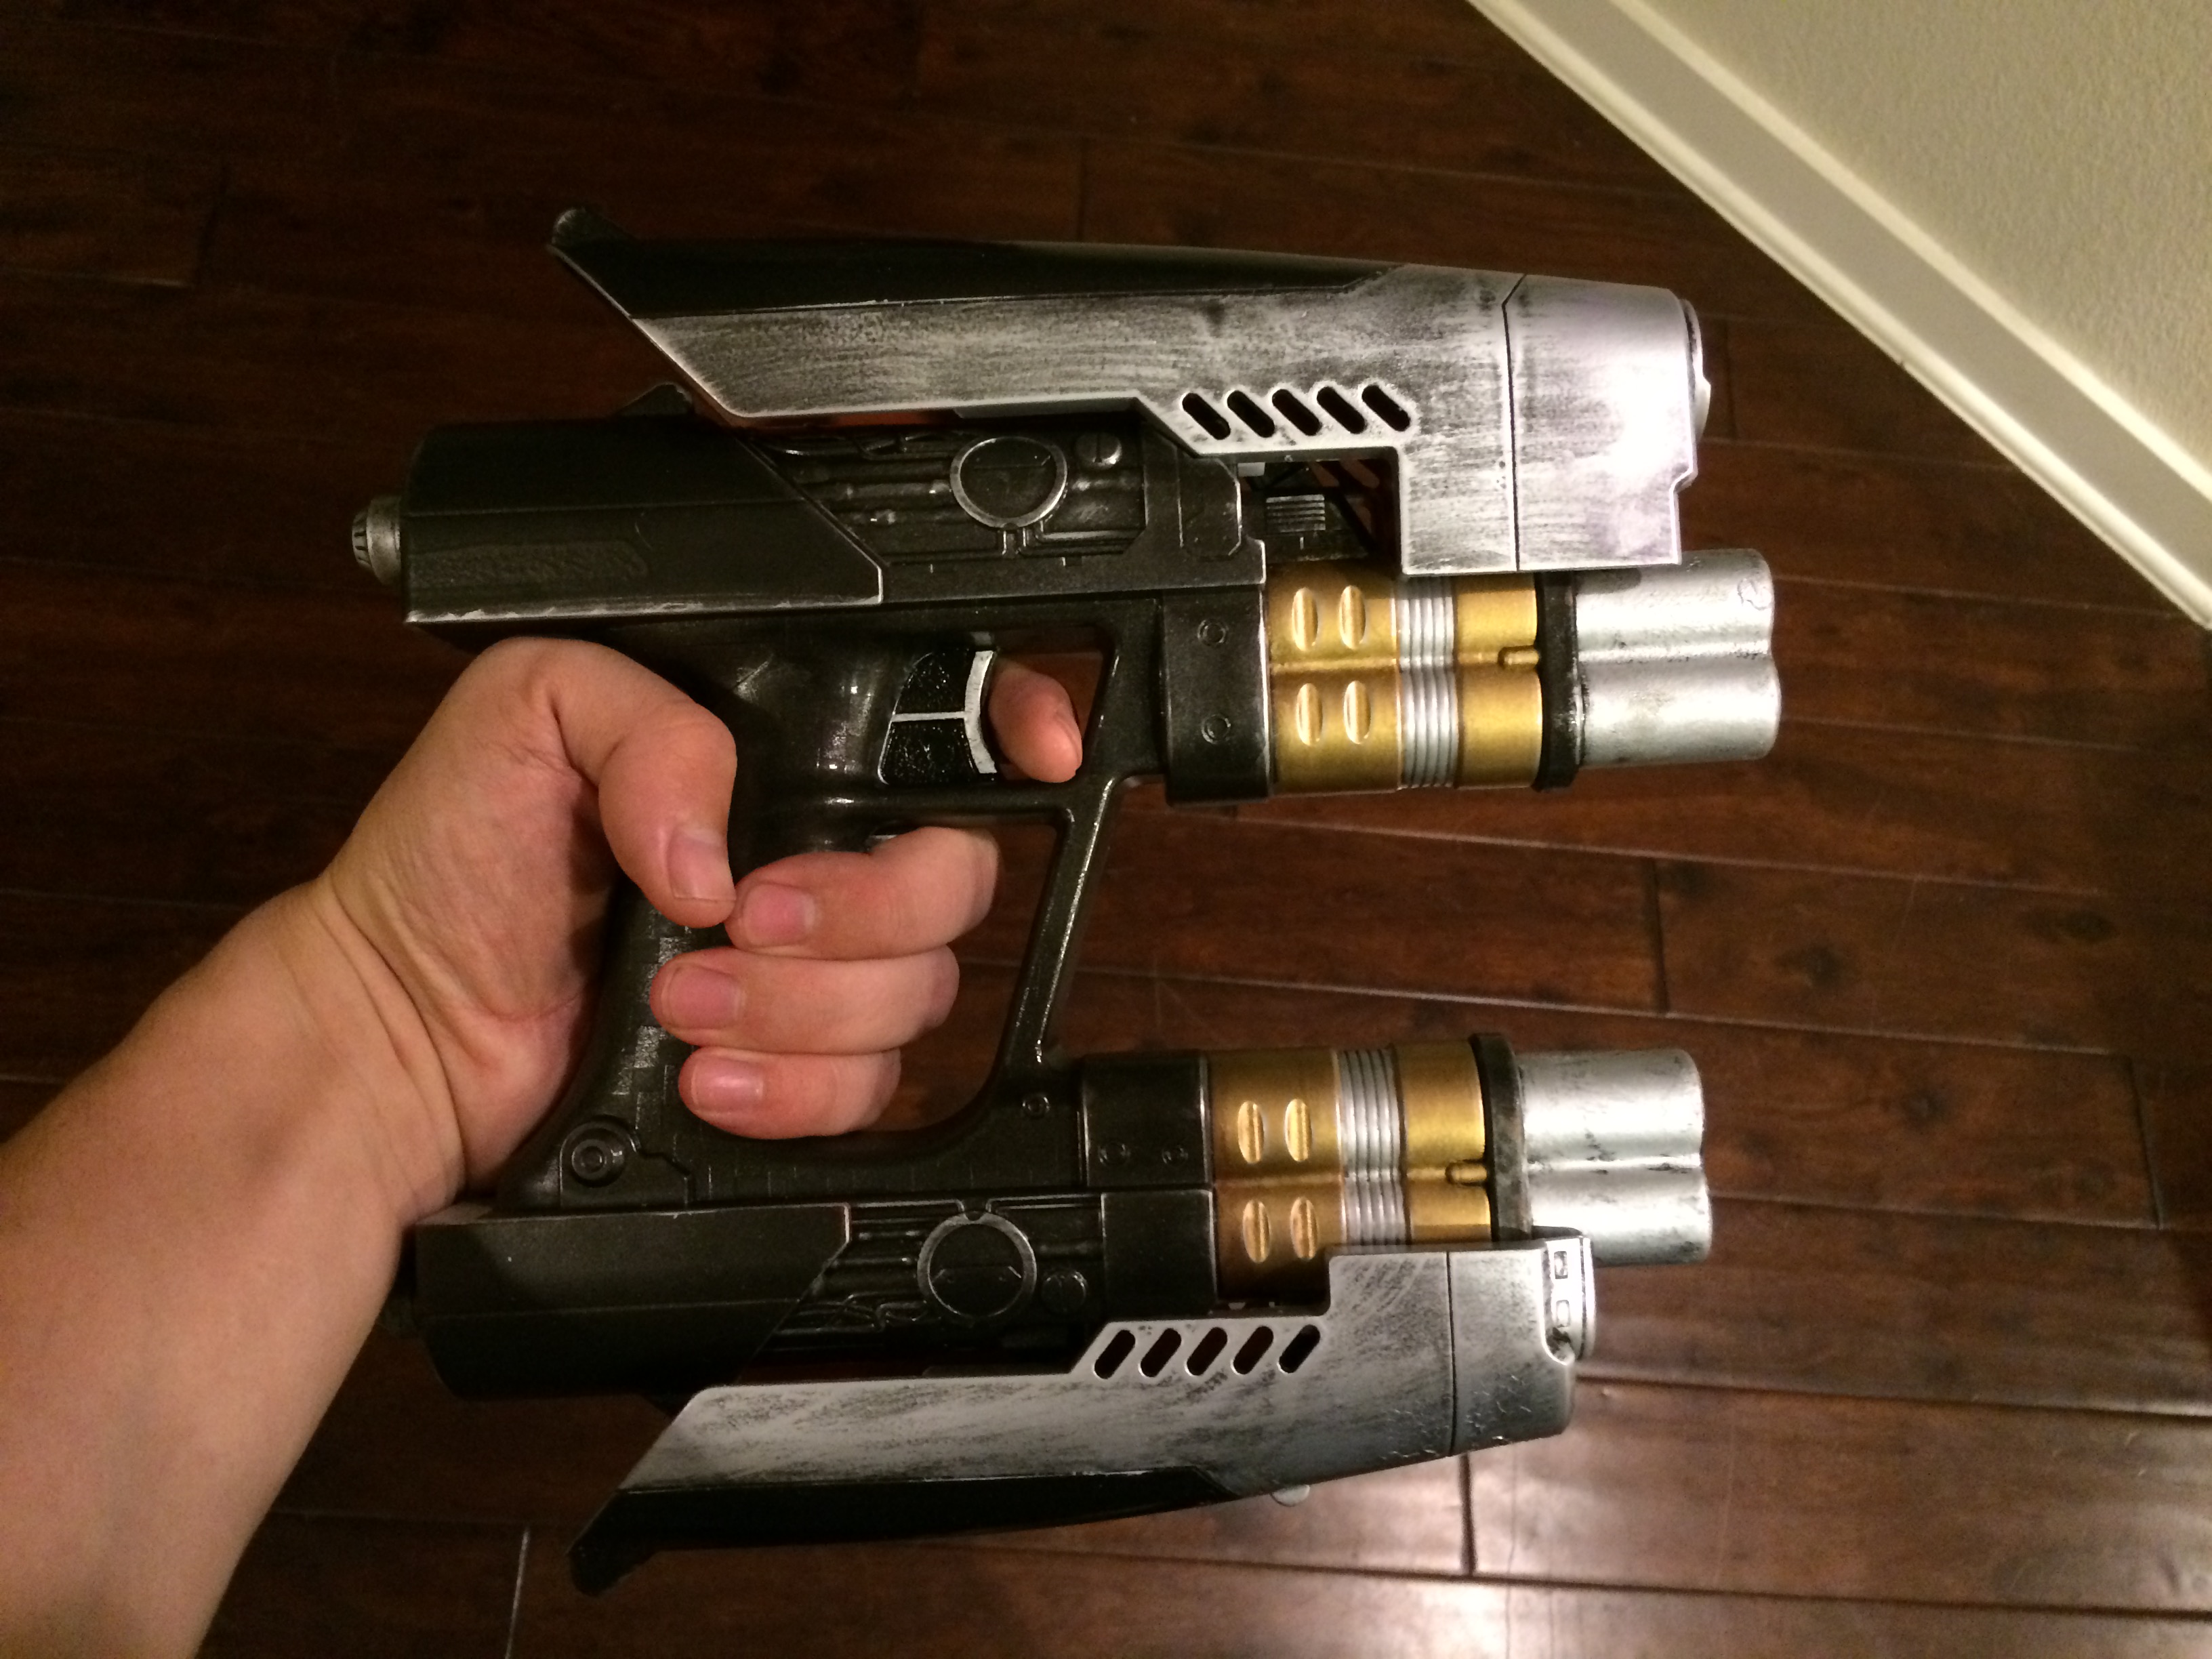
And so, without further ado, here are the before and after pictures:
Before and after. I was worried that the gold paint didn’t make that much if a difference, but it definitely does.
You may notice that I didn’t paint the barrel bluing onto the blaster. I actually tried a couple of different methods, but couldn’t get it right. I think an airbrush would be the way to go, but I don’t have that kind of airbrush skill. Or an airbrush, for that matter. And so, I elected to ignore that part of the paint job. I mean, at some point, Peter Quill’s blasters were new, right?
It looks ready for action!
And it still works!
As always, I appreciate any comments, suggestions, or questions! If you enjoyed reading about the project and have a couple of extra dollars, I (and CASA) would appreciate you supporting my fundraising effort! You all are awesome!